

Installing solar panels is becoming increasingly popular as homeowners look for ways to reduce electricity bills and adopt clean energy solutions. With rising energy costs and growing environmental awareness, many households are considering solar panels for home as a long-term investment. However, understanding the installation process is essential before starting. This step-by-step guide explains how homeowners can successfully install a solar energy system.
Understanding Solar Panels and How They Work
Before installation, it’s important to understand the basics of solar technology. Solar panels capture sunlight and convert it into electricity using photovoltaic (PV) cells. This electricity can then power your household appliances and lighting.
When homeowners install solar panels for home, they can either use the electricity directly, store it in batteries, or send excess energy back to the grid depending on the system design.
Step 1: Evaluate Your Home’s Energy Needs
The first step in installing solar panels for home is to analyze your current electricity usage. Review your monthly electricity bills to determine how much energy your household consumes.
Key factors to consider include:
-
Average monthly electricity consumption
-
Number of appliances used daily
-
Seasonal energy usage changes
This evaluation helps determine the size and capacity of the solar system you will need.
Step 2: Assess Your Roof Condition
Your roof plays a crucial role in the installation process. Solar panels are typically mounted on rooftops to maximize sunlight exposure.
Before installing solar panels for home, check:
-
Roof strength and durability
-
Roof orientation (south-facing roofs usually perform best)
-
Available space for panel placement
-
Shading from nearby trees or buildings
If your roof is old or damaged, repairs may be necessary before installation.
Step 3: Choose the Right Type of Solar Panels
There are several types of solar panels available, each with different efficiency levels and costs.
Monocrystalline Panels
These panels are highly efficient and have a longer lifespan. They are ideal for homes with limited roof space.
Polycrystalline Panels
These are slightly less efficient but more affordable, making them popular for many residential installations.
Thin-Film Panels
Thin-film panels are lightweight but usually require more space to generate the same amount of energy.
Selecting the right type ensures your solar panels for home deliver optimal performance.
Step 4: Select the Necessary Solar Equipment
A complete solar power system includes more than just panels. To install solar panels for home, you will also need:
-
Solar inverter – converts solar energy into usable electricity
-
Mounting system – secures panels to the roof
-
Solar batteries (optional) – store excess electricity
-
Wiring and electrical components
Choosing high-quality components improves the efficiency and reliability of the entire system.
Step 5: Obtain Necessary Permits and Approvals
In many areas, installing solar panels for home requires permits and approvals from local authorities or electricity providers.
These permits ensure:
-
The system meets safety standards
-
Electrical connections follow regulations
-
The installation is legally approved
Working with a professional installer often simplifies this process.
Step 6: Install the Mounting Structure
The mounting system forms the base that holds the solar panels securely on your roof.
During this stage:
-
Install mounting brackets on the roof.
-
Ensure proper alignment for maximum sunlight exposure.
-
Secure the structure firmly to withstand weather conditions.
A well-installed mounting structure ensures that solar panels for home remain stable and durable for many years.
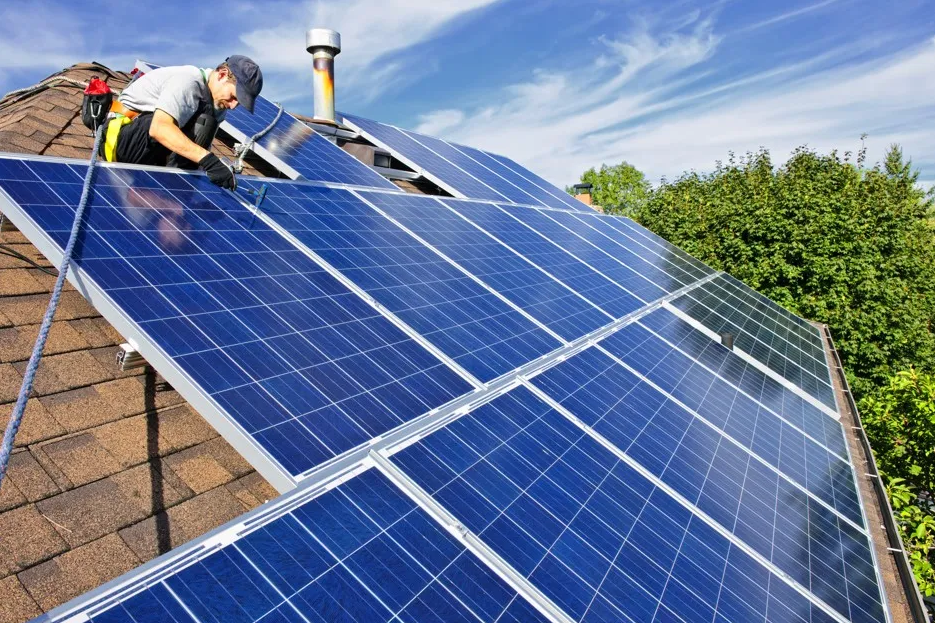
Step 7: Install the Solar Panels
Once the mounting system is ready, the solar panels are placed and secured onto the structure.
The installation team will:
-
Carefully position each panel
-
Secure them with clamps or bolts
-
Ensure proper spacing between panels
Correct installation helps maximize the energy output of your solar panels for home.
Step 8: Connect the Electrical Components
After the panels are installed, electricians connect them to the inverter and electrical system of the house.
This process includes:
-
Connecting solar panels to the inverter
-
Installing safety switches
-
Linking the system to the main power distribution board
This step allows electricity generated by solar panels for home to power your household appliances.
Step 9: System Testing and Inspection
Before the system becomes fully operational, it must be tested to ensure everything works correctly.
Technicians will check:
-
Electrical connections
-
Energy production levels
-
Safety compliance
Once testing is complete, your solar panels for home are ready to generate electricity.
Step 10: Monitor and Maintain Your Solar System
After installation, regular monitoring and maintenance help maintain optimal performance.
Maintenance tasks include:
-
Cleaning panels to remove dust and debris
-
Checking electrical connections periodically
-
Monitoring system performance through solar apps
Proper care ensures your solar panels for home continue producing clean energy efficiently for many years.
Benefits of Installing Solar Panels
Homeowners who install solar panels for home enjoy several advantages:
-
Lower electricity bills
-
Reduced carbon footprint
-
Increased property value
-
Long-term energy independence
These benefits make solar energy one of the most attractive solutions for modern households.
Conclusion
Installing solar panels for home is a smart and sustainable way to generate electricity while reducing dependence on traditional energy sources. By following a step-by-step installation process—from evaluating energy needs to system testing—homeowners can ensure a smooth and successful solar setup. With proper planning and maintenance, solar panels can provide reliable, clean energy for decades while helping you save money and protect the environment.